Showing posts with label tutorial. Show all posts
Friday, April 22, 2011
Basic Pillow Case
My baby Boo's 2nd birthday is coming up quick, only 64 more days! Right now that Little Boo is into construction trucks, especially excavators and backhoes. I thought he would like some new bedding for his big boy bed, which he just moved into a few weeks ago! Yay Little Boo!! Starting with an applique pillow case.
Messure an existing pillow case while it's laying flat. Double the height and add 1/2 an inch. Add about 4 inches to the width.
Laying the fabric right side down, fold over the side that will be the opening 4 inches. Add a 1/2 hem and sew it down.
If you are going to applique something to the front or add any other embellishments now's the time!
Fold in half right sides together and sew along the edge, but don't sew the opening closed!!
Turn right side out, fill with pillow, apply to bed and admire your handy work.
I can't wait to give this to my Boo in 64 days! I know he's going to love it. =D
Monday, April 18, 2011
Insulated Toddler Lunch Box
Here it is! Late... but better late than never! The insulated toddler lunch box! I made one of these for my Kyle. He loves it and gets so many compliments on it. Best of all mommy made it with love!
Supplies:
1/3 of a yard of outer fabric
1/3 of a yard of lining fabric
1/3 of a yard of insulbright
1/3 of a yard of light interfacing
A scarp of fabric at least 3 x 6 inches
3 inches of Velcro
Draw Out the Plan
Draw a straight line 8 inches long. Mark the exact middle. From the middle draw a line 9 inches straight down. Draw a line 11 inches long at the bottom with the exact middle (5.5 inches) being at the bottom of the 9 inch line. Taking your ruler connect the ends up the 8 inch and 11 inch lines. You should end up with a trapezoid. Yay!
Take a new piece of paper draw a line 7 inches long. From the center draw a line 3.5 inches long. Connect the ends of each line with a curve.
Cut Out the Fabric
Using the trapezoid pattern cut out two from the outer fabric, two from the lining fabric, two from the interfacing and two from the insulbright.
Using the flap patter cut out one from the outer fabric, one from the lining fabric, one from the interfacing and one from the insulbright.
From the scrap fabric cut out one 3 x 6 inch piece for the handle
Ironing
Iron the fusible interfacing to the two outer fabric pieces and the top fabric of the flap.
Iron the the 3 x 6 piece of fabric flat
Iron one side over at an inch
Iron the other side over 1/2 an inch so that the raw edges are touching.
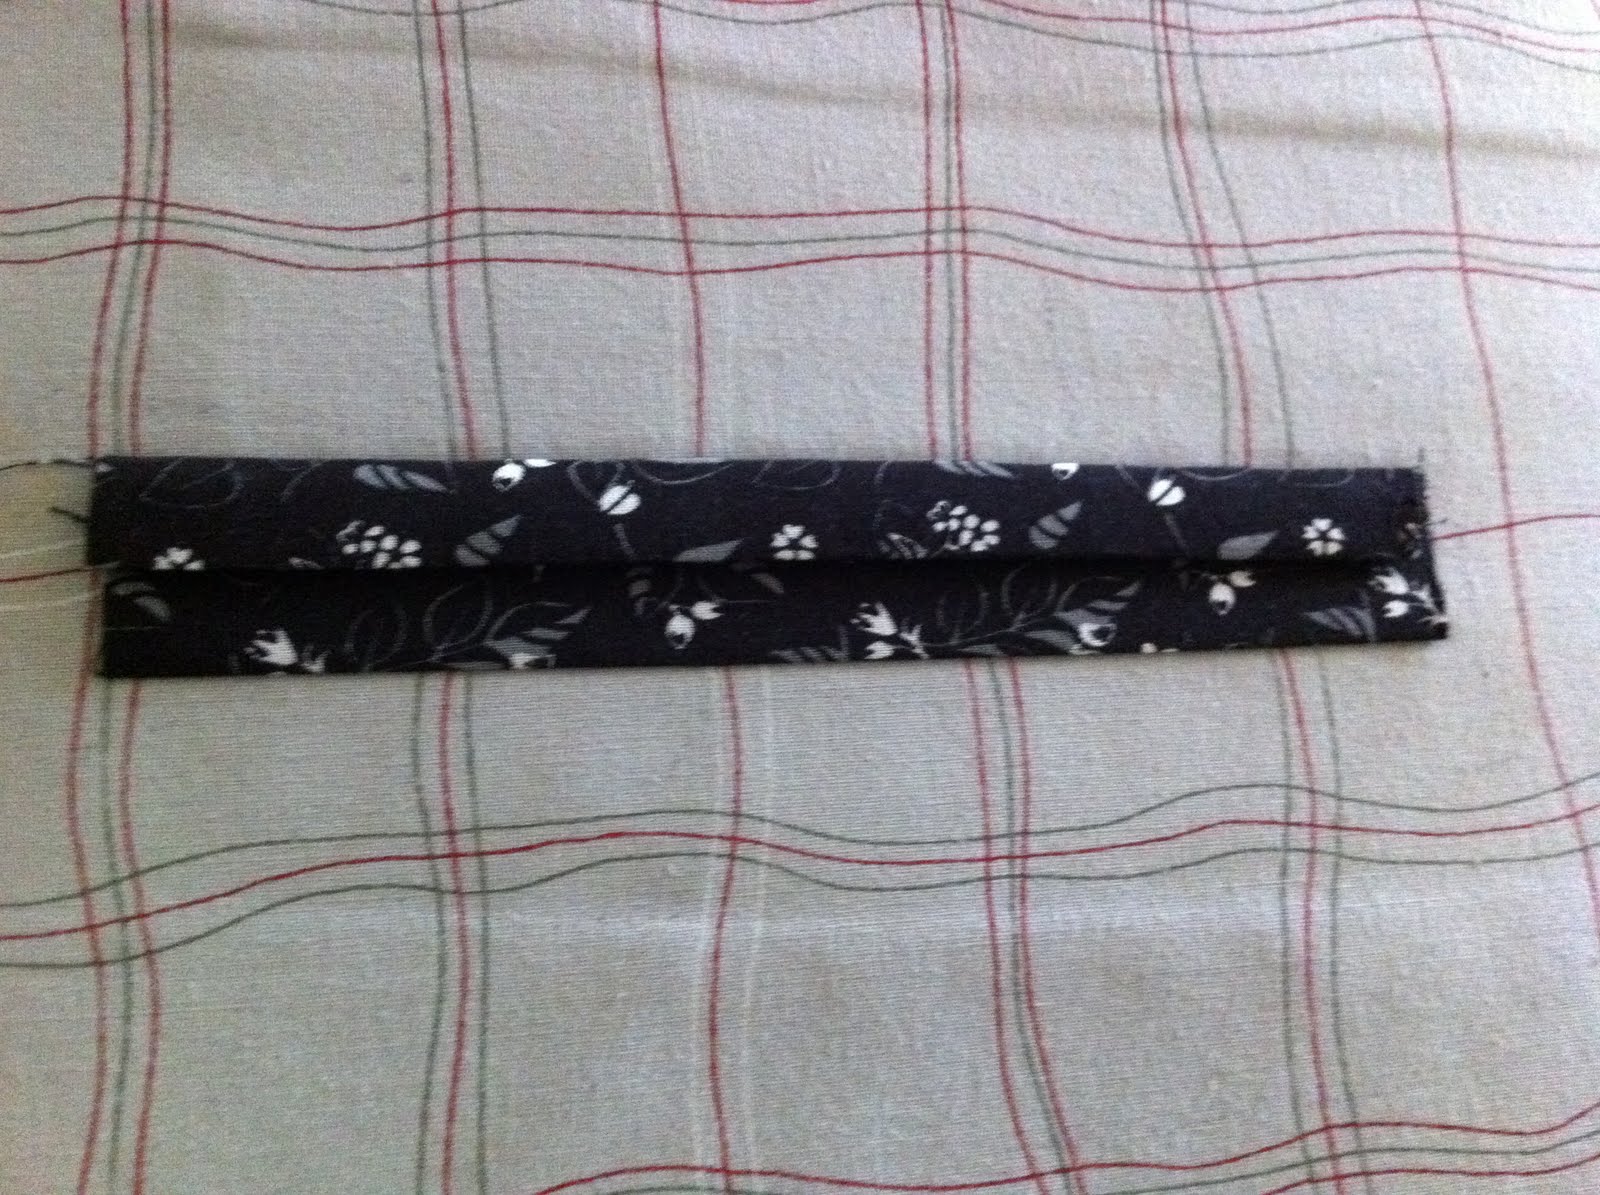
Iron short fold over one more time at 1/2 an inch. It should look something like this when done.
Sew closed along the seam down the middle
Sewing
Take the peice of fabric that will be the back of the lunch box. Find the center of the top and mark it. (It should be at 4 inches)
Pin the bag handle like shown on either side of that mark.
Using a basting stitch at 1/4 of an inch sew into place.
Take the bottom fabric for the lunchbox flap and sew one side of the 3 inch Velcro to it about 1/2 an inch up from the tip of the curve.
Next take all the lunchbox flap pieces.
Lay the fabric pieces right sides together with the insulbright under the top fabric.
<-----Like this
Match up the raw edges
Sew along to curve at 1/4 an inch.
Clip the curves, turn inside out, and press flat.
Center the flap on the back outer piece of the lunch box with velcro side facing up. Baste stitch into place.
The bag handle should be right underneath the flap at this point.
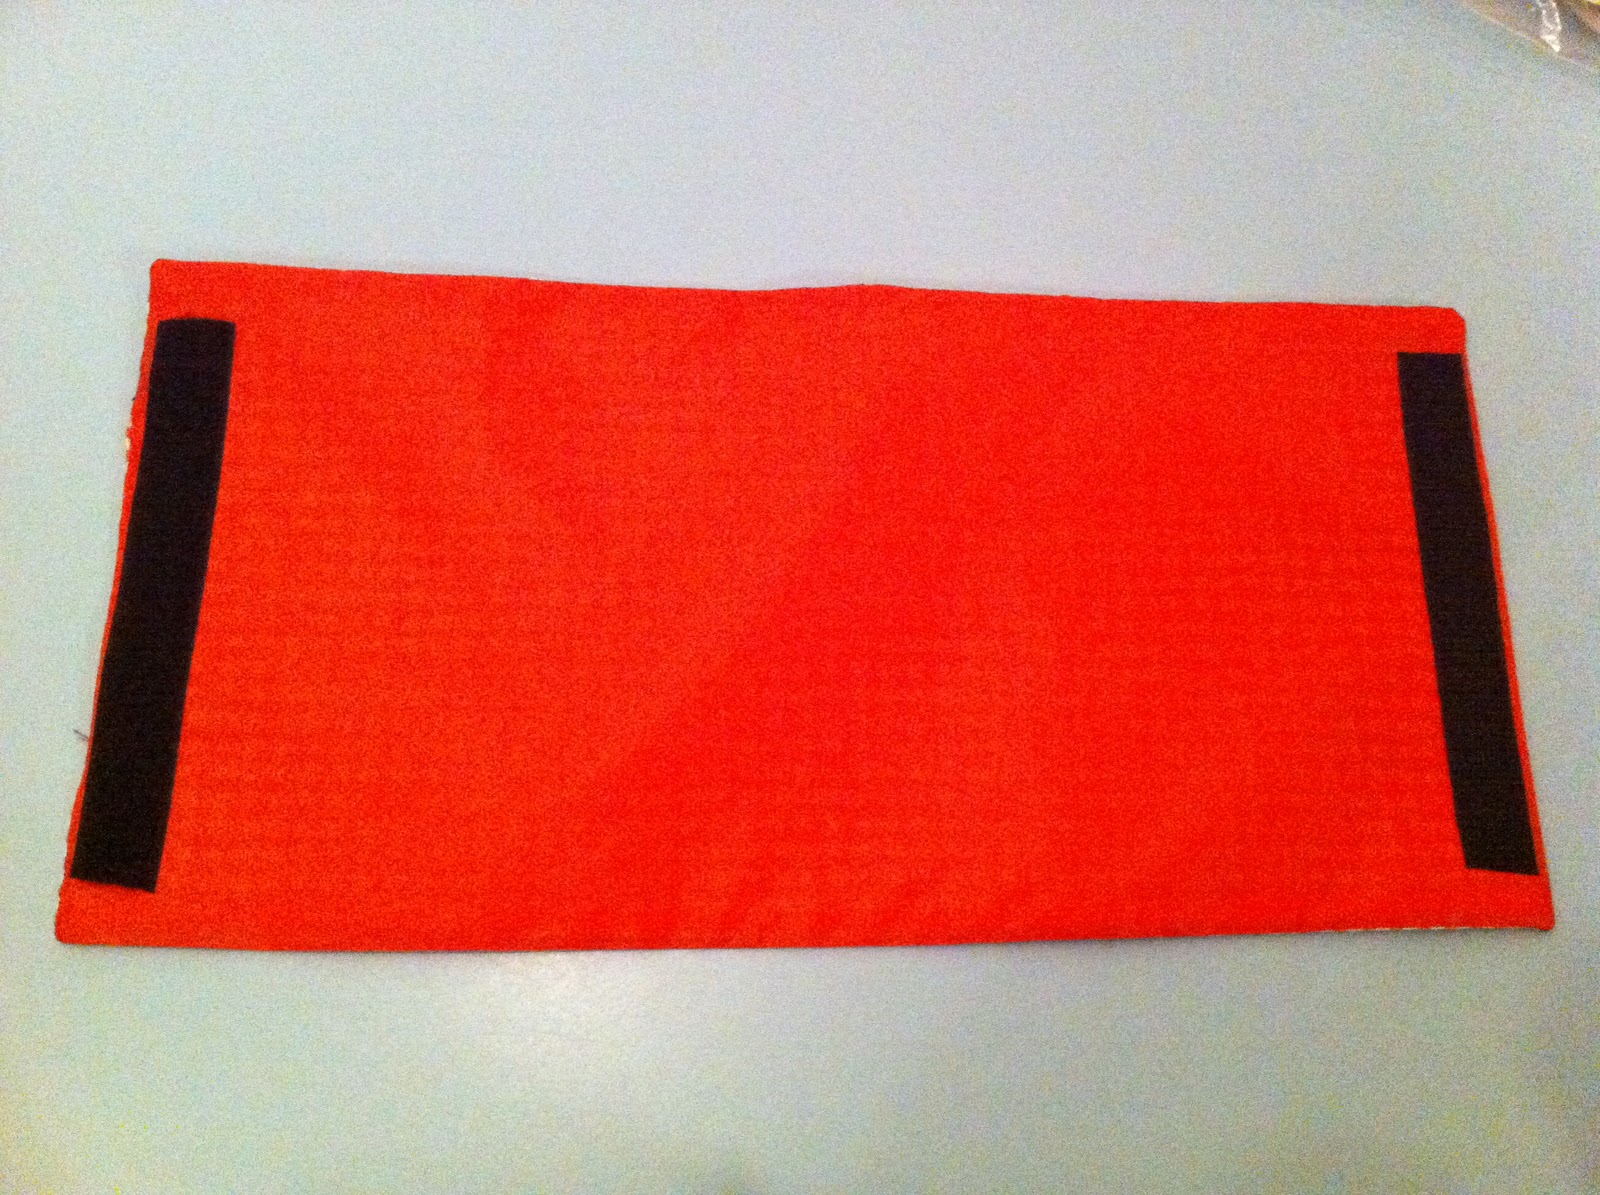
Measure 3 inches from each side and 2 inches down and place the Velcro.
Sew the Velcro into place on the front piece of the outer lunch box fabric.
Layer the fabric insulbright, outer fabric and inter fabric with the outer and inter fabrics right sides facing.
Sew along the top edge with a 3/8th seam allowance.
Repeat with the other fabric.
Go slow over the bag flap and handle area, that's a lot of layers to go through!
Open the fabric up and lay it so that the two inter-fabrics and the two outer fabrics are laying right sides together.
<----Like this
Sew along the edges leaving an 8 inch gap at the bottom of the inner fabric for turning.
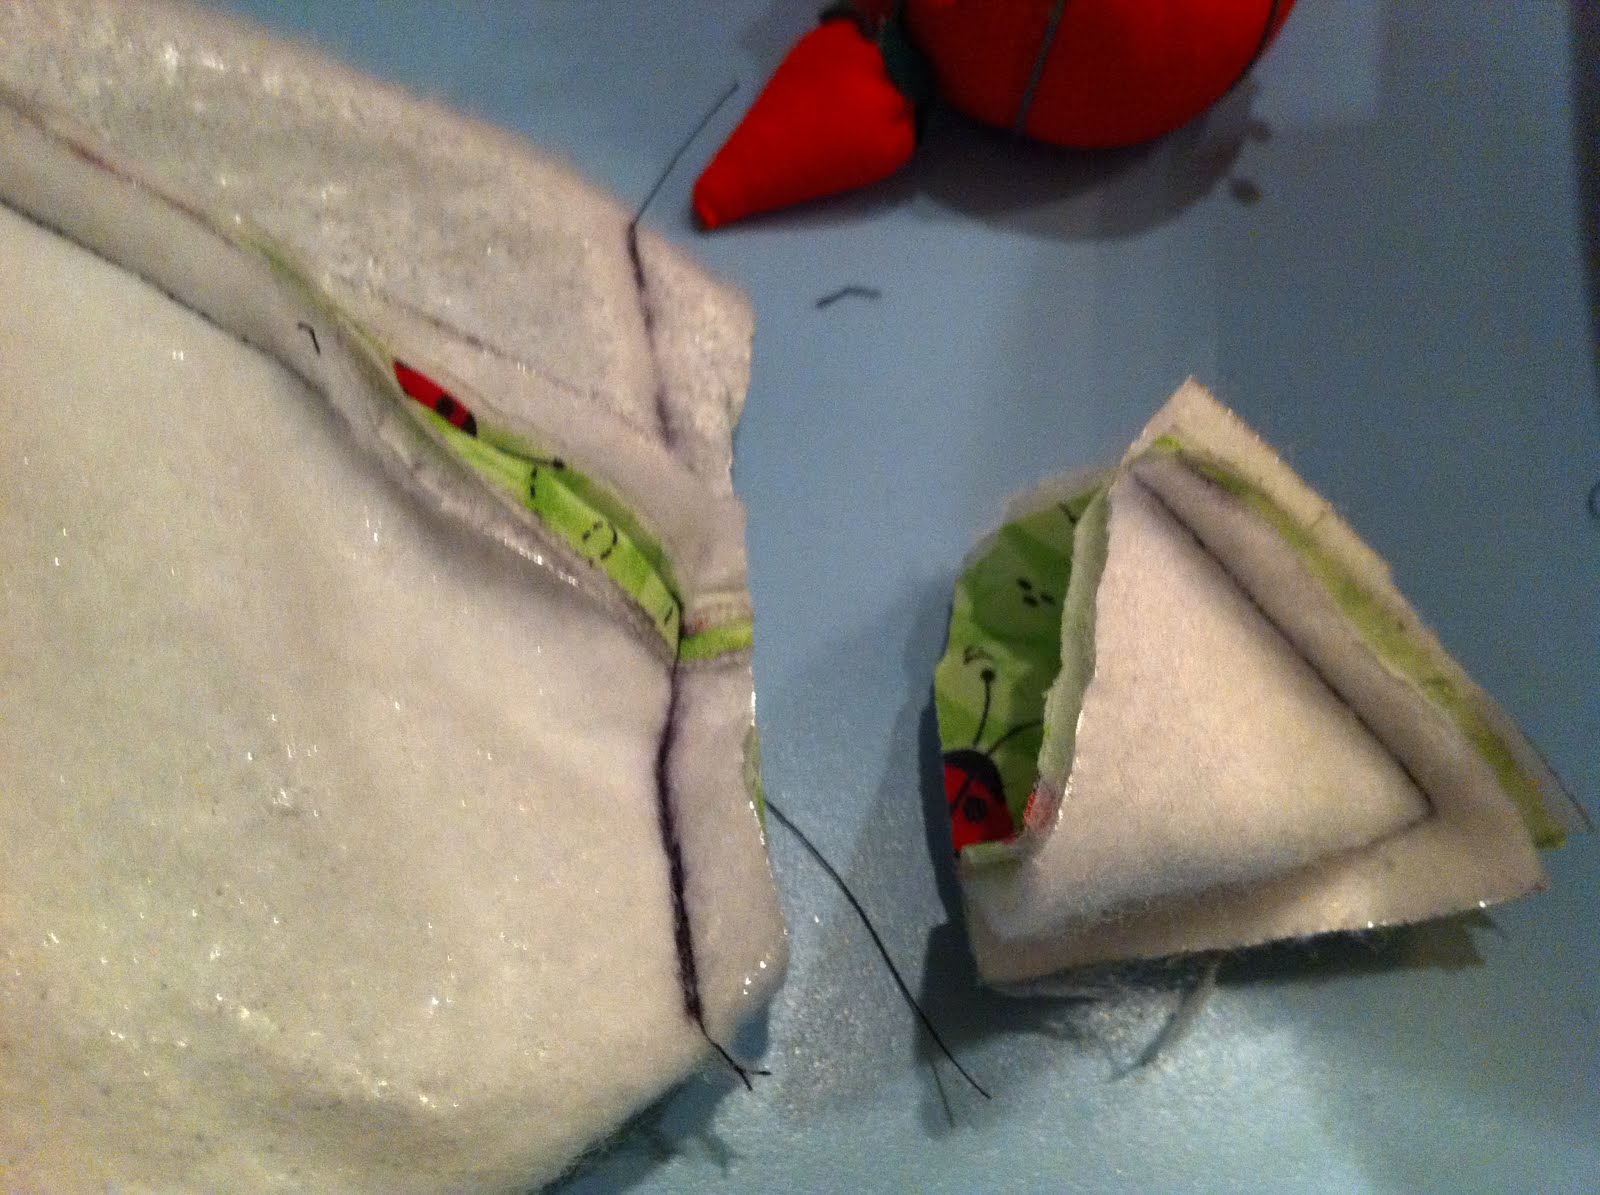
Next create a box corner by pressing the fabric together at the points with the seams open.
Measure two inches up from the point. Mark with a line. Sew down that line. Don't forget to back stitch to lock it all into place.
(No chipped lime green nail polish this time!)
Cut off the corner leaving about 1/4.
Repeat for the other 3 corners.
Turn the lunch back right side out with the lining sticking out.
Fold in the raw edges, press flat and sew the gap in the linning closed.
Shove the lining back into the lunch box.
Top stitch around the lip.
Call it done and admire your work!
From the scrap fabric cut out one 3 x 6 inch piece for the handle
Ironing
Iron the fusible interfacing to the two outer fabric pieces and the top fabric of the flap.
Iron the the 3 x 6 piece of fabric flat
Iron one side over at an inch
Iron the other side over 1/2 an inch so that the raw edges are touching.
Iron short fold over one more time at 1/2 an inch. It should look something like this when done.
Sew closed along the seam down the middle
Sewing
Take the peice of fabric that will be the back of the lunch box. Find the center of the top and mark it. (It should be at 4 inches)
Pin the bag handle like shown on either side of that mark.
Using a basting stitch at 1/4 of an inch sew into place.
Take the bottom fabric for the lunchbox flap and sew one side of the 3 inch Velcro to it about 1/2 an inch up from the tip of the curve.
Next take all the lunchbox flap pieces.
Lay the fabric pieces right sides together with the insulbright under the top fabric.
<-----Like this
Match up the raw edges
Sew along to curve at 1/4 an inch.
Clip the curves, turn inside out, and press flat.
Center the flap on the back outer piece of the lunch box with velcro side facing up. Baste stitch into place.
The bag handle should be right underneath the flap at this point.
Measure 3 inches from each side and 2 inches down and place the Velcro.
Sew the Velcro into place on the front piece of the outer lunch box fabric.
Layer the fabric insulbright, outer fabric and inter fabric with the outer and inter fabrics right sides facing.
Sew along the top edge with a 3/8th seam allowance.
Repeat with the other fabric.
Go slow over the bag flap and handle area, that's a lot of layers to go through!
Open the fabric up and lay it so that the two inter-fabrics and the two outer fabrics are laying right sides together.
<----Like this
Sew along the edges leaving an 8 inch gap at the bottom of the inner fabric for turning.
Next create a box corner by pressing the fabric together at the points with the seams open.
Measure two inches up from the point. Mark with a line. Sew down that line. Don't forget to back stitch to lock it all into place.
(No chipped lime green nail polish this time!)
Cut off the corner leaving about 1/4.
Repeat for the other 3 corners.
Turn the lunch back right side out with the lining sticking out.
Fold in the raw edges, press flat and sew the gap in the linning closed.
Shove the lining back into the lunch box.
Top stitch around the lip.
Call it done and admire your work!
Tuesday, April 5, 2011
Girl's Ruffled Half Apron
This apron for the Angel Heart Children's Shelter auction turned out A-dorable! Really! Look at how cute this thing is? Makes me wish I had a girl...
Girl's Ruffled Half Apron
Supplies:
Main piece: 16 x 9
Ruffle: 2 1/2 x 54 (you can sew two pieces together if needed)
Pocket: scrap of fabric at least 3 1/2 by 4
54 inches of double fold bias tape
Start with the main piece of fabric. Using a bowl or plate trace the curve around the corners and cut. I used a really large bowl.
If needed sew the ruffled strip together to get the right length and press the seam open.
Hem one side of the strip and do a basting stitch on the other side.
Need to know how to hem? Click here!
Gather the fabric by pulling the basting stitch, trying to create a cute little ruffle throughout like this one here.
Pin the ruffle to the main fabric, right sides together.
Use lots of pins around the corners. Be careful not to catch the ruffles while sewing. Stitch right along the basting stitch. I went back and reinforced the seam with a zig-zag stitch but that is really up to you.
Cut out a basic pocket shape. Fold the raw edges in by 1/4 inch and press flat. If you are using bias tape over the lip of the pocket like I did you don't have to fold the top of the pocket over. Attach the bias tape to the top of the pocket at this time.
Pin the pocket into place and stitch as close to the edge as you can. Lift the pressure foot and pivot at the corners.
Fold the bias tape in half to find the center, open the bias tape up and pin it to the center of the apron. Pin the bias tape all the way along the apron.
At the ends of the bias tape take about a 1/4 of an inch and fold it back into it's self creating an end to the tape. Pin in place.
Sew along the bias tape all the way from one end to the other, closing the opening in the bias tape and creating a cute top to the apron and straps!
And there it is the Girl's Ruffled Half Apron! (on a boy...)
On a dog...
And last but not least! On a toddler having a total melt down, because his mom dared to put this adorable apron on him, while big brother tries to comfort him. Don't let this effect your opinion of the apron, however, I'm pretty sure this grumpy toddler is teething all 4 canines this week.
Friday, April 1, 2011
Reusable Sandwich and Snack Bags
Here is something that is cool: Reusable snack bags! Make them out of any color or print you can dream up! Rocket ships, diggers and dozers, Spiderman, or like these I made for the Angel Heart Children's Shelter auction: Ladybugs.
Supplies for Sandwich Sized Bag:
Printed Fabric 7 ¼ x 14 ½
Pull or Non-Rip Nylon 7 ¼ x 14 ½
5 ½ inches of Velcro
Supplies for Snack Sized Bag:
Printed Fabric 5 ¼ x 9
Pull or Non-Rip Nylon 5 ¼ x 9
4 inches of Velcro
All seem allowances are ¼ inch.
Pin the printed fabric and pull/nylon right sides together. Sew around 3 edges leaving a gap on one of the short sides for turning. I used a zigzag stitch to give it strength since a toddler will be pulling on it.
Clip corners and turn right side out. Press flat making sure to tuck in the edges on the gap.
Pin the Velcro to the pull/nylon side as close to the short edge as you can, so that the gap can be sewed closed, and 1/2 inch from the long sides. Sew in place. Repeat on the other side.
Fold in half, lining up all your sides. Top stitch along 3 of the sides. Do not stitch over the opening. Trust me, you won’t be able to get to your sandwich!
And there you have it! As simple as that!
Now your kids can be the envy of the lunch table and help reduce waste! Bonus for you: these are machine washable. Get some jelly stuck in there? Simply turn inside out and hand wash or throw it in the washing machine. Line or tumble dry. Awesome!
Subscribe to:
Posts (Atom)